Monday, October 14, 2013

Farming for statues throughout the spiral:


This is a list of Statues that can be Farmed, Picked up, or purchased through out the Spiral. They are in order by the world as it comes available. This list does not include, busts, bases, or wall hangings.

Wizard City:
Dropped:
Colossus Statue- Prince Gobblestone
Cyclops Statue- General Akilles
Firecat Statue- Alicane Swiftarrow 
 Triton Statute- Sergeant Skullsplitter
Unicorn Statue- Lady Blackhope (available in Crown shop and Knight's Lore Pack)


Wraith Statue- Baron Mordecai (HALLOWEENFEST ONLY) GRUBB, Sunken City Boss


Purchased with PVP/Derby Tickets:

Grand Cyclops Statue-500 Tickets -Roland Silverheart
Statue of St. Hubert - 485 Tickets- Roland Silverheart
Antonio Sculpture- 750 Tickets - Roland Silverheart
Chained Kraken Statue-800 Tickets- Roland Silverheart (Also See Celestia Pick Up)


 Krokotopia:
MOST of these are also Possible Reward from  Pharaoh's Hoard Pack

Dropped: 
Blue Ancient Statue- Khai Amahte the Great
Ice Chameleon Statue- Soul Scavenger
Khai Amahte Statue- Khai Amahte the Great (Crown Shop) 
Prince Aka Karanahn Statue- Prince Aka Karanahn
Prince Meti Karanahn Statue- Prince Meti Karanahn (Crown Shop) 
Prince Manu Nirini Statue- Prince Manu Nirini
Prince Suten Sokkwi Statue- Nirini Champion (Crown Shop)
Purple Ancient Statue(Head)- Tempestra
Red Ancient Statue (head)- Nirini Quartermaster
Storm Chameleon Statue- Son of Storms

Quest Reward: 
Fire Chameleon statue- Into the Map Room (Professor Winthrop, Main Quest)

Bought: 
Painted Chameleon Statue- Ea'rik- Krokosphinx Furniture vendor

Grizzleheim:

Pick Up:
Grandmother Raven Statue- Mirkholm Keep Near Skellig's Cave

Winterbane Personal Dungeon-
Dropped:
Raven Tree Statue - Erikur Axebreaker (Tier 2)

Wysteria-
Pick Up: 
Proud Pegasus Statue- Aerie

Aquila:
PICK UP: 
Grand Statue of Zeus- Mt. Olympus In the Main room, top of stairs, center.(lvl 30 Dungeon)
Atlantean Great Statue- Atlantea Entrance (lvl 70 dungeon)


Mooshu: 

Dropped: 
Frog Statue- Fushiko (Emperor's Attic Pack)
Imperial Statue- Jade Oni, Mika Skarka (Boss in Mooshu to Access Avalon)
Monk Statue- Wavebringer
Samoorai Statue- Death Oni
Statue of Hyottoko- Kagemoosha (Crown Shop)
Statue of Koto- Jade Oni, Mika Skarka (Boos in Mooshu to Access Avalon)
Stone Dog Statue- Wavebringer, Yakedo

Dragonspyre:

Dropped: 
Hydra Statue- Vika Markmaker (Crystal Grove Side Boss from Zarek Pickmaster)
Kraken Statue-Silver Sentinel
Minotaur Statue- Karuvian Scargiver (Plaza of Conquests)
Obsidian Firecat Statue- Vesta Shadowmark (The Forum)
 Oni Statue- Katia Firewinter (The Crucible)
*Regal Dragon Statue*- (Snapdragons Like This) Giant Homonculous, Kraysys 
Wyrmkin Statue- Andor Bristleback (The Labyrinth)

Quest Reward:
Boris Blackrock Statue- The Last Lesson (Main) 
Great Dragon Bust-Foe of Foes (Main)

Celestia:
Dropped: 
Cepholapod Statue- Marcio (Random Boss at Summoning Pylons)
Stellar Protector Statue- Wildcrag (Floating Lands)
Water Mole Statue- Gahlwok (Floating Lands)

Pick Up: 
Celestian Legion Statue - The Portico
Chained Kraken Statue- Stormriven Temple (Also Roland Silverheart in Unicorn Way for Tickets)

Crafted: 
Celestian Magician Statue- Gearwise
Crab Claw Statue- Gearwise
Tiki Statue- Gearwise

Zafaria:
Pick Up: 
Stone Lion Statue- Neman Rock - Nergal's Cave

Avalon:
Dropped: 
Avalon Statue- Horned Brocket, Morag Bloodtine, Spriggan, Stag Charger, Strangler Goblin

Azteca: 
Bought: 
Aztecasaur Statue**- Skyvern's Hoard Pack
Aztecasaur Stela**- Skyvern's Hoard Pack
Butterfly Shrine** - Skyvern's Hoard Pack

Dropped:
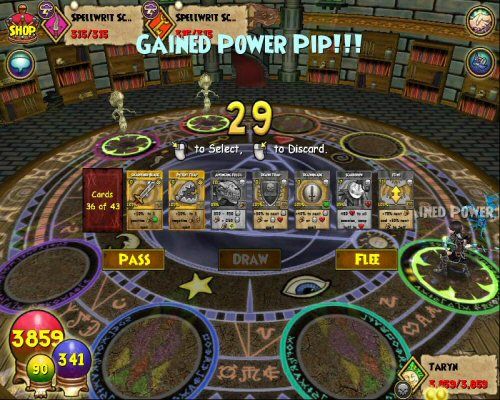
Regal Dragon Statue- (Snapdragons Like This)  - (DURING Lost Pages Event ONLY) Bentley Daysong , Spellwrit Wingtooth (available year round in Dragonspyre, scroll up!)

 (** Indicates that it is usually found in the Bazaar)


Crown Shop: 
(if they were previously marked as in the crown shop I did not include them here)
Avalon King Statue- 1500
Avalon Knight Statue- 1500
Great Moodha Statue- 1500
 Prince Biti Nirini- 1000
Statue of St. Bernard-560


As of today, these are all the available statues in the spiral, that I can locate proof of existing. See you in the Spiral! Happy farming! 


The Family that plays together, slays together!

Hi guys! I haven't posted in quite a while! I got a new job and I'm not online quite as much as I used to be, and when I am, I'm usually busy saving the spiral! I'm now playing my life character, Alexandra Darkbane, Archmage Theurgist, she's 6 levels shy of Promethean! I got my parents both playing and we've been forging a path through the spiral, finally, we've arrived in Azteca together as a family! This should prove much easier with help than it was on my previous attempt with Taryn being mostly solo!

I live 2 states away from my parents, having moved away after marrying the love of my life. Wizard101 has proved a great way to stay in touch with them, and helps me feel like I'm getting to spend time with them, even though hundreds of miles away. 

Dad, Me, and Mom at the end of Zafaria In Mirror Lake

Me, Dad, and Mom at the End of Avalon During Halloweenfest 2013-

It's Halloweenfest in the spiral and I'm so excited! I LOVE LOVE LOVE this event! I've been hard at work on the quests and have completed them on 5 out of 6 characters. The Frankenbunny pet is Adorable! And I'm so glad they've given us that extra special treat this year. Love the new dungeon addition, and really having a great time slaying those veggie revenants and Nosferabbit! 

I've been super hard at work, crafting and decorating houses. I will try to grab some screenshots to share. I did craft the Wyrd house for Taryn, I love it, but I admit that there's very little room inside the 2 available "inside" areas. It would be nice if there were a little more to it, especially with all the effort it takes to craft it.

Well, I'm going to make a useful post now, just wanted to get everyone caught up on what I've been doing!  See you in the Spiral! 

Sunday, May 5, 2013

The Art of Hurtful Spells

There are a lot of helpful spells in our arsenal, unfortunately some of them also hurt us in the process, making some afraid to use them. Death Wizards receive more than their fair share of such spells, but there are a few others out there as well. This post will mainly be directed towards Death Wizards, but everyone else should also pay attention, because there are Treasure cards, item cards, pet cards, and some other schools involved! Today's post will help you learn how to correctly and successfully use these spells to their fullest potential while doing as little damage to your character as possible.  

SACRIFICE
The first spell of this type that we are introduced to is Sacrifice. This is a Heal spell and  is gained by Death Wizards at the completion of the quest, "The Sixth School" and the end of Wizard City. 
Sacrifice is an AWESOME spell, but when you read the description, and you realize it's going to take half of your health to use it, it seldom goes into your deck right away.  This  is unfortunate, because when used correctly this is an awesome spell to have in your arsenal. All you need to do is use your Death Shields! You can train -80% death damage shields from Sabrina Greenstar in the Commons Fairgrounds. When you load your deck, include the same number of shields that you load of Sacrifice. When the death shield comes up, whether you think you will need it or not, cast it! Once you are shielded, you can use sacrifice for a significantly less (around 24-36) damage to yourself to heal yourself or your friends for 700 health!  

Sacrifice FAQ

 Can Sacrifice make me Defeat myself in battle?
Yes, but if you have used it on yourself, it will also bring you back to life, you will loose all blades and pips. 

Will Sacrifice use Blades and Traps?
YES! However, if you've shielded the damage will be significantly less. Sacrifice will use all Death and Balance blades, It will use all death and Universal traps (Feint, Curse, hex).  You can also critical, which does double damage, but also offers a double heal!

Will Doom and Gloom effect Sacrifice?
YES! Doom and Gloom will not effect the damage it does to you, but it will cut the heal in half, just like any other healing spell. This can be detrimental to you if you are in a dungeon like Waterworks where Doom and Gloom stays up all the time, my advice, don't load Sacrifice in Waterworks, it's a waste of pips and deck space there.

FEINT
Yes, I categorize Feint as a Hurtful Spell. This Spell is attainable by any school for 7 Training Points at the Death School from Professor Dworgyn in Nightside at Wizard City. This spell is a little different. Rather than always shielding Death before you use it, you need to shield according to what type of enemy you are fighting. This will significantly cut the damage caused by the trap on you.  Feint boosts the damage of the next Damage Spell by 70%, but it also places a curse of 30% on the caster.

There are a few things to look out for when using feint. If you're fighting an enemy that likes to shield, save feint for last. Put it on one round before you plan to attack, this will save you the grief of breaking the feint with a wand or another low damage spell. Also, let your team mates know if you plan to use the feint or if it's up for grabs. You may also want to announce that you plan to feint so that your team mates don't accidentally use it with a wand. This can be very frustrating for Death Wizards. 

Other schools playing with Death Wizards, please be courteous. Don't hound the Death Student to feint, chances are if it's in their deck, they're planning on placing it. If the person who placed the Feint doesn't state their intentions, Ask if you can use it before you do, most of the time the caster won't mind, as long as it's a solid and strong hit that it's used for.


DARK PACT 

This is a Charm spell and is gained by Death Wizards with the completion of the quest "I Know A Guy/Thief of Spells" from Erik Wyrdrune in Grizzlehiem at level 35.
An Extra blade! Who wouldn't love that?! Sounds great, right? Until you read the description... Again, DEATH SHIELD BEFORE YOU USE DARK PACT!  Also, make sure that you cast Dark Pact before casting any Balance blades or Death blades, because it will use them to cast this blade. It will break death traps and universal traps on you. Only use Dark Pact if it can be used before any other blades. The blade it's self may be cast on you or your friends. But again, be careful before using it. 

Dark Pact FAQ

Can Dark Pact make me defeat myself in Battle?
YES! And there is no coming back from this one, unless your friends can heal you. 

Will Dark Pact use my other blades? 
YES! It will utilize all blades, traps, and shields that pertain to Death Spells. 

Can I critical on myself?
YES! So make sure those shields are in place!

EMPOWER
This is a Utility spell and is obtained by Death Wizards at level 38 from the quest "In The Clearing." I could not find a current picture, I'll try to get one uploaded later, but at the moment I'm on my life wizard. :P
This spell has been NERFED. It no longer does 500 damage, it now does 300 damage to give you 3 pips. This spell is not like Balance's Donate Pips. While it gives 3 single pips (It will not give you power pips), it is only used on the caster. If you have 7 white pips and need power pips in order to use a spell, this can provide you with those pips. You can not give your friend the pips. Again, you should Death shield before you use this spell. It will use your blades and break traps and shields. However, YOU CAN NOT CRITICAL yourself on this spell any longer. This Spell can make you defeat yourself, and will not revive you in battle. 

BAD JUJU

This is a charm spell gained by Death Students at level 75 in Avalon from the quest "Always After Me Charms." given by Fianna Yellowknife in High Road. 


Bad Juju is just that, to me. Bad Juju... I have not liked this spell since it was introduced. My reasoning is that I do just as much damage to myself as the enemy would without the -90% weakness. However, that being said, if you shield, it does significantly less damage, the problem is, at that level your deck is huge, and it's hard to get the cards in the order you need them in to use this spell effectively. It also urks me that it's the same spell that's left by the Fire Wizards awesome damage spell Efreet. While Juju is significantly less pips, it also does no damage to the enemy in the process. Take it or leave it for me.

FIRE WIZARDS
IMMOLATE
At the end of Krokosphinx, you receive a wonderfully delightful spell called Immolate.This spell is the one that made me fall in love with my Fire wiz!
By placing a fire shield before using Immolate, you can do very little damage to yourself while destroying  your enemy! Place as many of your -80% Fire Shields in your deck as you have Immolate, shield up, blade up, trap up, and BOOM, you're golden.


STORM WIZARDS

INSANE BOLT

Well, just like the name says, this spell is INSANE! I've seen it used successfully in one instance, unfortunately I was on the receiving end in the PVP arena! LOL, just my luck! Anyhow, the only thing I can suggest for using this spell is a lot of prayer. LOL! Even with shields, if it chooses to hurt you instead of your opponent no amount of resistance and no number of shields will protect you from the whopping 10,000 damage your going to inflict on yourself.


This concludes our lesson on Hurtful to Helpful spells. If I've forgotten anything, please feel free to comment and let me know so that I can add it!

See you in the Spiral!

Saturday, May 4, 2013

Shields:Explained

SHIELDS aka WARDS
There is a 100% Accuracy to all shields. The ONLY reason that a shield will fizzle is because there is a Dispel or a -45% precision (Black Mantle, Smoke Screen) placed on you by your opponent.

There are several types of shields. 

School Shields
These shields are Free to train for your school at level 10 from Sabrina Greenstar in the Wizard City Fairgrounds in the Commons area.  These shields are single shields to protect you from the magic of your own school for -80% Damage. 


TRAINED WARDS FROM PROFESSORS: 

Each School is able to train one DOUBLE shield, these shields negate damage by -70% each. These may be purchased for Training Points.

Myth School   Death School    Life School
 Ice School
Fire School      Storm School

BALANCE SCHOOL ONLY SHIELDS- Though TC are available to every one. 


And Finally, Armor

There are 3 types of Armor. 

LIFE SCHOOL:
Spirit Armor is available for Training Points from the Life School. For 3 pips you absorb 400 Damage from your opponent, recieving Zero damage up to 400 hit points. It works with Life mastery Amulet. 

Ice School Armors:
Ice Armor is a Ice School Only Spell. It is received from the spell quest "Going Ice Snaking" at level 18. This is an X pip spell, meaning it will use ALL available pips accordingly. Power or single pips.  Each pip will render 125 hit points of Absorption, if you have 2 white pips you will get 250 absorb, 1 power pip will render the same amount of absorb.

Frozen Armor is an Ice School Only Spell. It works the same ways as Ice Armor, but provides 175 absorption per pip. It becomes available at Level 55 with the spell quest "The Runedown" in Grizzlehiem from Erik Wyrdrune.

Star School Wards:
These spells are not trained until you are higher level (50+) but since you can receive them from gardening well before that, I thought I would include them. These spells can not be stolen with "Steal Ward" spell from Ice School.
Fortify
This spell provides 15% protection for the next 4 rounds after it is cast. It doesn't sound like much, but trust me, it comes in handy!

Conviciton
 While this is not protection per say, it does block incoming critical and stun attempts.


When to be a Thief: Steal Ward/Charm

It's been a while since I had a useful posts for beginners, so I thought it was time to cover  the steal cards.

When to use Steal Ward:

First, let's cover what this spell is and how to get it. Steal Ward is an Ice School Only spell. It's received at the end of the Krokosphinx main quest "Back To Balance", regardless of level. It costs 2 white pips or 1 yellow power pip for Ice students, (those with Ice mastery amulets as well.) It has an 80% accuracy, but enchantments may be used on it to increase the accuracy. 

Now, let's discuss what a Ward is, exactly. A ward is any 'shield' that prevents or cuts damage percentage.

To properly use this card, one of the opponents you are dueling MUST  have a ward (be shielded), and the shield must remain in tact until you have cast your spell in order for it to work properly. Otherwise, you waste 2 pips and get a nice close up of the opponent. When cast properly, the shield from your opponent will float across the dueling circle and now be on you. You can use this spell on all Wards. This includes Towers, Shields, Armors, etc. It is allowed in PVP. This allows you to remove shields without breaking blades and traps.  This is EXCELLENT for those cheating bosses when you get higher level. Not only do you get to steal their -90% towers for yourself, but you open them up for your friends to attack them until they can cast again! (This method doesn't work on all of them, some interrupt as soon as you steal, but with a few, it is possible.)


WHEN TO USE STEAL CHARM:
 
 
Steal Charm is a 1 Pip Fire School Only Spell. It is received at the end of Wizard City with the completion of the quest "The Sixth School", regardless of level. 

A Charm is Any Blade. By Stealing the blade you can accomplish 2 things. First, you diminish the boost that the opponent has with the blade, Secondly if it is a blade that can be used with your next spell, you now have a blade, or an extra one. (i.e. A Fire Student Steals a Balance Blade Charm, you now have the balance blade and your own casted fire blade.) 

To properly cast this spell, your selected opponent MUST have a blade present. Otherwise, you've wasted your pip. It's tricky using this spell when your turn is second, because of the possibility of the opponent using the blade before you cast. My advice, count their pips before you waste a turn!


Wednesday, April 10, 2013

Fortune Cookie Tree and Goose Tree


This was the best angle I could get on the Goose Tree at Harvest. It is extremely hard to raise, or perhaps it's just giving me trouble. It has gone into Progression to Dead 4 times since I planted it. It does not reseed, and is not as visually exciting as I had hoped. If it progresses to dead once more I plan to plow it, it is simply not worth the effort to me.

I received it from an Emperor's Attic Pack as well as the Maltese Tiger Lily (it is not pictured because it hid behind the regular Tiger Lilies, but it looks like the White Tiger Lily.)and the Fortune Cookie Tree.

The Maltese Tiger Lily and the Fortune Cookie tree have been extremely easy to raise and have given me no problems. They get along well with the other plants in the garden and have not progressed to dead once. This garden is not set up like my others. It's for visual stimulation, rather than a goal of snacks or reagents. I wanted to share this with you, so that you would see what they looked like and decide if it's worth the trouble for you.

"Toaddley" Perfect Pet Part 2

Yesterday afternoon I continued my quest for a Toaddle with Spritely and Incredibly Infalliable pierce train.

I hatched King Spencer (The product of the first hatch) A 2nd Generation Night Hawk,


back to Toby, the 1st Generation Toaddle. 


And got Queen Dixie- 3rd Generation Toaddle with Spritely and Infalliable by adult. 
 While the project has been a perfect success, I'm considering taking it a step further. Now that I have my Infallible and Spritely, I may try to add some other talents to her. Perhaps another heal, unicorn or Fairy friend. Unfortunately I've depleted my stock pile of mega snacks in the course of this project and one more. I know, I know, but I'm impatient and I'm not fond of training, so megas work for me. LOL I have 3 large gardens that provide me with lots of mega's, I'm just waiting for them to go to elder. In the mean time I guess I'll feed out some of these rank 6 and 7 snacks I have piling up.

ALSO: 

Short rant about Grumpy Gobblers Training Game.

It's so annoying to me when I hit something and it doesn't give me the points, and worse still, leaves the block or cut out for me to hit, AGAIN. Waste of a shot, if you ask me. Though Grumpy Gobblers is my favorite and quickest Training Game. 

Tuesday, April 9, 2013

"Toaddley" Perfect Pet- Hatching for talents- My personal project. Pt.1

My level 31 Storm wizard is rather pitiful. Her health is low, she fizzles quite frequently, and even with crown gear, she is defeated quite often.  I have some great pets, the problem is that my Toaddle which helps with the fizz, doesn't have spritely, and my Night Hawk, which has spritely, doesn't help with fizzle. 

SOLUTION:
I decided to hatch them together and see if I could get a pet with Incredibly Infallible and Spritely.

These are the pets that I started with: 

Toby- 1st Generation Toaddle from Purreau's Plentiful Pet Pack


Harley- 1st Generation Night Hawk from Hawk Rider's Bundle


THE RESULT OF THE 1ST HATCH

King Spencer- 2nd Generation Night Hawk


Trained To Teen: Gained Talent Spritely


Trained to Adult: Gained Talent Incredibly Infalliable


He is currently halfway to Ancient, I will train to Ancient to see what talent he gains, however, the project was a success in a single hatch using the 1st Generation parents, even though it was not the pet that I wanted.  The Talents I aimed for were both manifested by adult.  I consider myself very lucky at this point. I will continue this project until i get the talents I want on the Toaddle. 


Friday, April 5, 2013

Test Realm: Lost Pages Event: Part 2

Right As Rain

 Arthur Weathersfield in Ravenwood will now send you to Triton Avenue, where you will need to use "Dee's Mirror" on your search for the lost student, Kestrel. 

You will arrive at Dee's Mirror just outside the Haunted Cave. Indicated on the map by the yellow puzzle piece outline.


Upon entering you will find yourself at the beginning of a dungeon. It stated 1 hour to complete solo, of course higher levels will be quicker It took me about 7 minutes to solo and that was passing a lot on the second floor to find out the spells cast.


1st  floor 2 Spellwrit Scremaers  
315 each Storm
They do have Myth Shield


2nd Floor- Kestrel Blackstorm & Rotting Fodder
Speech: "Have you read The Book of Lost Pages? Come with me through the Spiral, and I'll show you the great truths.
No? Then Prepare to be storm-blasted, intruder!"
Minion: Rotting Fodder 150- Storm

Kestrel Blackstorm-Rank 2 Boss
1055 Health Storm
Starts with 1 Pip
Spells used: 
Dark Fairy, Storm blade, fizzed a lot, Lightning Bats, Thunder Snake, possibly Myth shield, though she did not cast it. ( I passed several rounds to see what she would use.)

Kestrel End speech:  "Ow, my aching head! I can't believe I attacked you. I'm so sorry! Those stupid Pages Cursed me. Can you forgive me?

Then speak to Arthur Wethersfield in Ravenwood.
You will earn the badge: 
Scribe of the Howlin' Wind
which will appear on page 26 of your badges


This concludes Part 2 of this quest and this entry. 

See you in the Spiral!